How to Make Homemade Gourmet Ice Cream - Any Flavor
Using a Gel-container Ice Cream maker!
 What's
better than fresh picked fruit? Perhaps fresh premium ice cream? So let's
take some fresh-picked fruit and make our own homemade ice cream! It is
actually quite easy, and electric ice cream makers are inexpensive! You can make
plain vanilla ice cream, strawberry ice cream, peach ice cream, raspberry,
blackberry, blueberry, or many other flavors! If you have an ice cream maker
that requires ice and salt instead of the freezer bowl,
see these instructions
instead!
What's
better than fresh picked fruit? Perhaps fresh premium ice cream? So let's
take some fresh-picked fruit and make our own homemade ice cream! It is
actually quite easy, and electric ice cream makers are inexpensive! You can make
plain vanilla ice cream, strawberry ice cream, peach ice cream, raspberry,
blackberry, blueberry, or many other flavors! If you have an ice cream maker
that requires ice and salt instead of the freezer bowl,
see these instructions
instead!If you are looking for an instruction manual for your ice cream maker, we have them, too! See this page.
Directions for Making Homemade Ice Cream
Ingredients and Equipment
|
|
 3
cups of prepared fruit (strawberries, peaches, raspberries, mangoes, or
whatever you have! See step 7 for details.
3
cups of prepared fruit (strawberries, peaches, raspberries, mangoes, or
whatever you have! See step 7 for details.Instructions
Step 1 - Pre-Freeze your ice cream maker's gel container
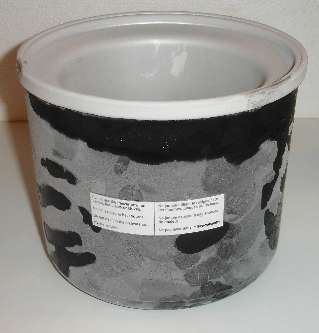 Before
you even think about making ice cream, you better get the gel container
in the deep freeze and start it freezing up. Models vary, but
generally the recommend
Before
you even think about making ice cream, you better get the gel container
in the deep freeze and start it freezing up. Models vary, but
generally the recommend the length of time needed to freeze the unit is between 6 hours and 22 hours. It depends on how cold your freezer is. If you have the room, just leave your freezer bowl in the freezer at all times. That way, you can take it out any time for immediate use.
To determine whether the bowl is completely frozen, just shake it. If you don't hear liquid moving, it's frozen! Before freezing the bowl, wash and dry the bowl, then place the freezer bowl in the back of your freezer where it is coldest. (Note: Your freezer should be set to 0°F for most foods, including ice cream!)
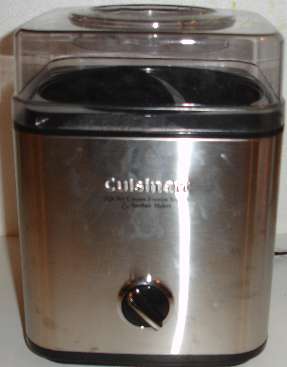
| Crass commercial message: (Well, I warned you!) - I've tried many different types of ice cream makers over the past 25 years, and the Cuisinart ICE-30BC "Pure Indulgence" is the easiest, simplest, and neatest (as in not messy) ice cream / gelato / sorbet / frozen yogurt maker I've used. just pop the gel bowl in the freezer and, depending upon how cold your freezer is, within 6 to 12 hours, it's ready to make ice cream, without ice, salt or mess. It also has an opening in the top to add flavorings... or to sample as it freezes.. .YUM! Highly recommended! BlakeOn the other hand, the Rival model is cheaper, but I haven't tried it. And if, for some demented reason, you actually want to hand crank for 25 minutes, the Donvier model offers that, um, "pleasure". |
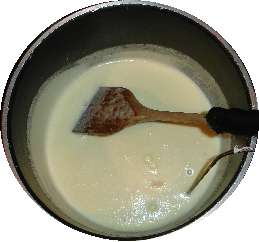
Step 2 - Heat the milk, sugar and powdered milk
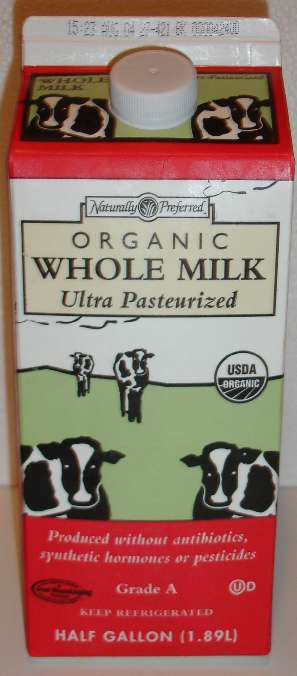
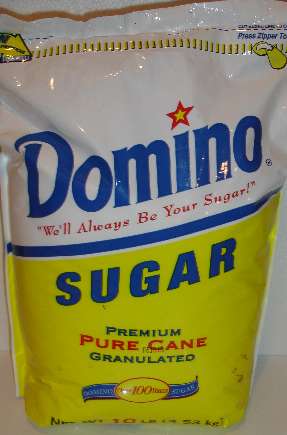
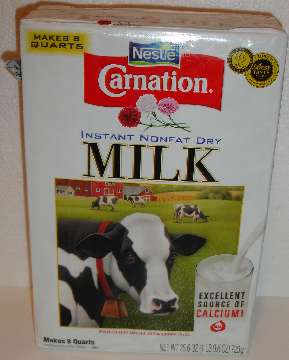
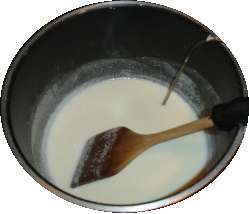 In
a large pot ( 4 quarts or larger) with a heavy bottom (for even heat
distribution), mix the milk, sugar and powdered milk. Bring the mix to a
low simmer over medium heat and stir to dissolve the sugar, then turn
the heat down and just keep it warm.
In
a large pot ( 4 quarts or larger) with a heavy bottom (for even heat
distribution), mix the milk, sugar and powdered milk. Bring the mix to a
low simmer over medium heat and stir to dissolve the sugar, then turn
the heat down and just keep it warm.Step 3 - Separate 8 egg yolks
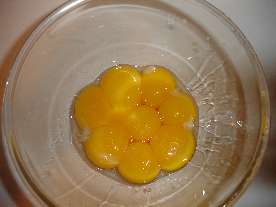
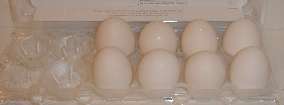 Separate
the egg yolks from 8 large eggs.
Separate
the egg yolks from 8 large eggs.
Step 4 - Whip the egg yolks until thickened
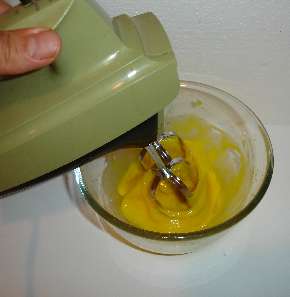
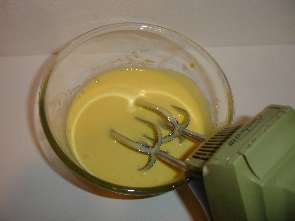 Put
the egg yolks in a medium bowl and whisk until they are thickened (it only takes
about 2 minutes. I use a hand mixer on low speed.
Put
the egg yolks in a medium bowl and whisk until they are thickened (it only takes
about 2 minutes. I use a hand mixer on low speed.Step 5 - Slowly add 1 cup of the hot milk mixture to the egg yolks
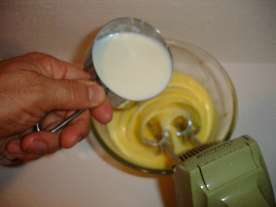 While
constantly whisking, slowly add 1 cup of the hot milk mixture and whisk until it
is blended (a few seconds).
While
constantly whisking, slowly add 1 cup of the hot milk mixture and whisk until it
is blended (a few seconds).
Step 6 - Pour the egg yolk mix into the pot of hot milk
 Then
pour the egg mixture back into the pot of hot milk and increase heat to medium.
Stir the mixture constantly with a wooden or plastic spoon, until the
mixture is thickened (like gravy) and registers between 170°F and 180°F (check
with an instant-read thermometer, like the ones with a probe).
Then
pour the egg mixture back into the pot of hot milk and increase heat to medium.
Stir the mixture constantly with a wooden or plastic spoon, until the
mixture is thickened (like gravy) and registers between 170°F and 180°F (check
with an instant-read thermometer, like the ones with a probe).
Step 7 - Add the light cream and vanilla and refrigerate
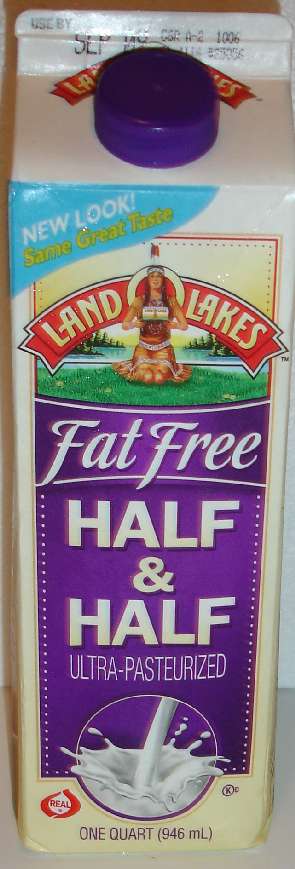 Stir
in whipping cream (or light cream or half-and-half) and vanilla. Cover and pop into the
refrigerator for at least 6 hours before continuing on to step 8. Overnight or
even 24 to 48 hours is fine.
Stir
in whipping cream (or light cream or half-and-half) and vanilla. Cover and pop into the
refrigerator for at least 6 hours before continuing on to step 8. Overnight or
even 24 to 48 hours is fine.Step 8 - Prepare the fruit
Well, what kind of ice cream do you want? This is the time to decide! You can add almost any fruit you have! If you want vanilla, you already have it, just pop the mix into the maker. If you want chocolate, just skip the fruit and add the chocolate syrup in step 10. I add about 1/2 cup of chocolate syrup - I use the Hersey's sugar free syrup, but both the variety and amount are a matter of personal taste preferences!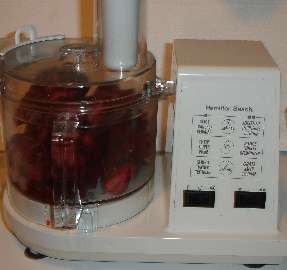 For
a fruit flavor, well, some fruit work better than others. You get best
flavor if you puree the fruit first in your food processor or blender. So
obviously, fruits like strawberries, raspberries, mangoes, figs and peaches are
idea for this, while apples, coconuts and pomegranates might not be such a good
choice.
For
a fruit flavor, well, some fruit work better than others. You get best
flavor if you puree the fruit first in your food processor or blender. So
obviously, fruits like strawberries, raspberries, mangoes, figs and peaches are
idea for this, while apples, coconuts and pomegranates might not be such a good
choice.
To prepare the fruit just prepare it as you would for eating, then blend it in your food processor or blender for a few minutes. Here are some tips:
- Peaches and nectarines: remove skins, pits and bruised areas
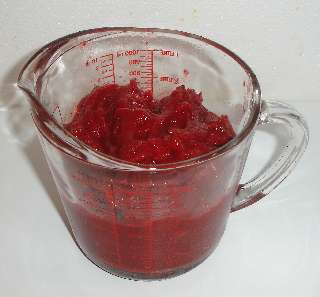
- Strawberries: remove the cap (the green parts)
- Raspberries: just wash them
- Blackberries: I like seedless, so I wash them and then run them through a Foley Food Mill to remove the seeds!
- Figs: Remove stems and bruises
- Mangoes: Peel, and cut the flesh off the stone.
Step 9 - Mix the milk/cream mix with the fruit
 About
45 minutes before you want to serve the ice cream, stir the milk/cream
mixture together with the pureed fruit. Stir it up well. Remove the freezer
bowl and pour the milk/cream/fruit mixture from step 8 into the freezer
bowl. Put the bowl in the cream maker.
About
45 minutes before you want to serve the ice cream, stir the milk/cream
mixture together with the pureed fruit. Stir it up well. Remove the freezer
bowl and pour the milk/cream/fruit mixture from step 8 into the freezer
bowl. Put the bowl in the cream maker.
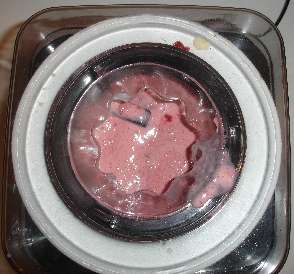
Step 10 - Fire up the ice cream maker!
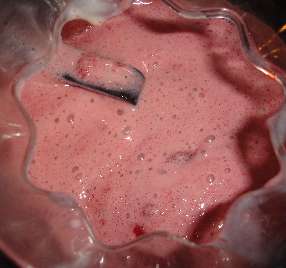 Turn
the ice cream maker on and let the maker work until it is thickened, about
20 to 25 minutes.
Turn
the ice cream maker on and let the maker work until it is thickened, about
20 to 25 minutes.
If you are making chocolate ice cream, this is the time to add the chocolate syrup. I add about 1/2 cup of chocolate syrup - I use the Hersey's sugar free syrup, but both the variety and amount are a matter of personal taste preferences!
You can tell when the ice cream is done, by simply checking the consistency through the opening on the top of the ice cream maker. You will also hear the motor straining, as the ice cream freezes. On some units, the directions with the maker tell you to let it work until the motor stalls and stops.
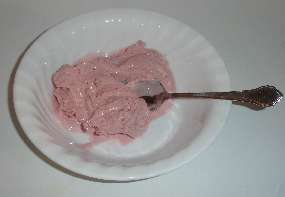
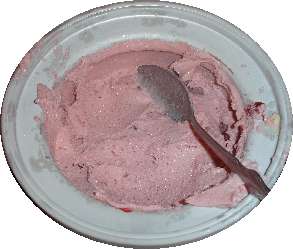
When it is done, the ice cream should have a soft, creamy texture. If you want firmer, harder ice cream, transfer the ice cream to an airtight container and place it in freezer for about 2 hours. Remove from freezer about 15 minutes before serving.
Step 11 - Enjoy!
Hey,
once it reaches the consistency you like, it's time to eat! That's it!
You made great homemade ice cream!Frequently Asked Questions
- None yet!

|
Presto 01781 23-Quart Pressure Cooker/CannerThis is usually about $80 PLUS SHIPPING. (which is a GREAT price for a pressure canner). There is also a 16 quart version for about $69. Click on the links at left or above for more info and current pricing. It is also available from Amazon .com (click on the box link at left) (and below from Target)Features:
|
|

|
Shown at left is
the Presto 23 quart pressure canner. Features below and click here for more information
or to purchase from Target.
Features:
|
|
|
|
Presto 01781 23-Quart Pressure Cooker/CannerAmazon usually has this (through the links at left) for about $79. (which is a GREAT price for a pressure canner). Click on the links at left for more info and current pricing.Features:
|
|

|
All American Pressure Canner and Cookers - In 3 SizesFeatures:
|
|
|
|


No comments:
Post a Comment